ABOUT US

Micropropagation : Pineapple


MICRO-PROPAGATION  TECHNIQUE IN PINEAPPLE 

Conventionally the average production is 4-5 propagules per year and it takes considerable time to produce enough planting material.  Large-scale production of planting material can be achieved by using in vitro micropropagation techniques.  A protocol for large-scale multiplication has been established using dormant auxiliary buds from pineapple crowns with a capacity of producing 1000-1200 plants in a year from a single crown.  The protocol has been standardized for the establishment of cultures, multiplication, rooting and hardening of the plants in the field.  Tissue cultured plants have been field planted at the BARC campus and the Rashtriya Chemicals Fertilizers (RCF) Experimental Field at Alibagh. Pineapple is very easy to propagate vegetatively. Suckers arising in the lower axils of the leaves on the main stem form roots and can be used for propagation. Even the crown of leaves above the fruit and parts of the stem itself can be used. Another method of propagation is by slips, which are the propagules arising from the base the fruit. Suckers and slips should be preferred over the crown for planting as they come to bearing earlier and produce larger fruits.

TISSUE CULTURE PROTOCOLS FOR PINEAPPLE
INTRODUCTION
Tissue culture is a collection of experimental methods whereby fragments of living tissue are isolated from plants and grown respectively on a nutrient rich medium for a definite period. The beginning of plant tissue culture was made as early as 1898 – German Botanist G. Haberland (father of tissue culture). Totipotency is the basis of plant cell and tissue culture. Each cell of a multicellular organisms is capable of independent development when provided with suitable conditions by regeneration. By the development of suitable medium (1940-1970) for plant cells, tissue, protoplasts, anthers, root tips, and embryos In vitro morphogenesis of plants was successfully done.
METHODS OF PLANT TISSUE CULTURE
Basic Steps:
1. Preparation suitable nutrient medium: Suitable media is prepared for pineapple tissue culture and transferred into suitable containers and autoclaved at 15 psi for 30 minutes. 
Growth Regulators
Four broad classes of growth regulators namely auxins, cytokines, gibberellins and abscisic acid. Differentiation and organogenesis of tissue become feasible only on the addition of growth regulators. Auxins induces cell division, elongation of stem,internodes,tropism,apical dominance and rooting.Auxins used are IAA,NAA,IBA,24-D.Cytokines are mainly concerned with cell division, modification of apical dominance and shoot differentiation. Most frequently used are BAP,BA,2-iP.Gibberellins and abscisic acid enhances callus growth according to the species.
Vitamins and Amino acids
Cultured cells are normally capable of producing vitamins and amino acids for performing various metabolic activities .If the cells are unable to produce, addition of vitamins and amino acids to the medium is recommended.
Antibiotics Addition of antibiotic in the media retards the cell growth. But some cells have systemic infection of microorganisms. To prevent the of microbes we use antibiotics.(gentamycin).
Preparation of stock solution (MS)
A series of standard stock solutions are prepared for the preparation of MS and other media. Specific media are prepared for callus initiation, multiplication, elongation and rooting.
2. Surface sterilization of the explant and inoculation into the medium
Explant (slips, suckers, crown and leaf) obtained directly from the field grown pineapple should be surface sterilized in the laminar air flow chamber using the chemical agent in order to remove the microbial contamination on their surface. These microbes utilize the nutrients faster than the plant due to their brief life cycle and finally kill the plant tissue. Healthy explants were selected and washed in running tap water for 15 minutes, subsequent step were done in LAF aseptically Explants were kept in 1% saaf for 20 minutes The chamber is swabbed with ethanol before starting work .Sterile Petri dishes, 70% ethanol, mercuric chloride were kept on the table of laminar cabinet Explants were transferred to sterile beaker and treated with 0.1% mercuric chloride for 10 minutes. The explant were surface sterilized by frequently swirling the beaker. Sterilized explants were then thoroughly washed several times with sterile distilled water.The explants were then transferred aseptically to basal media with hormones for callus initiation and observed periodically.
3. Fumigation : To control contamination, fumigate the culture room, laminar air flow chamber and mist chamber using formaldehyde. For fumigating the LAF potassium permanganate is used with formaldehyde.
4. Contamination : There are chances for contamination even if each step of plant tissue culture is done aseptically. The contamination may be caused by bacteria and fungi. The bacterial contamination is treated with 0.05% mercuric chloride. Antibiotics (Gentamycin) are also used, they are added in the medium after sterilization. The fungal contamination is treated with 0.5% saaf. 
5. Hardening : The tissue culture plants that have shoot and root are treated with trichoderma (10g/l) and 0.5-0.6ml any rooting hormone (NAA,IAA & IBA) for 30 minutes. These plants were planted in soil which is mixed with pseudomonas, trichoderma and rock phosphate (each 10g/l). The plants were kept in the mist chamber for one week. These plants were watered regularly. After one week these plants are kept outside the chamber and saaf is sprayed on them. The plants are watered regularly as before. Two weeks later bavastin is sprayed. After 2-3 weeks hilban is used for spraying. Once in every week ash (10g/l) and urea (20g/l) is sprayed.
Selection of suckers: Suckers are selected from disease and pest free healthy plants. Suckers are to be graded into those having less than 500g, 500-750 g and more than750g in weight to avoid competition between plants of different sizes. Suckers weighing 400-500g or slips of 350-450g are considered ideal for planting. The graded suckers are planted in different blocks or plots, to get uniformity in growth and flowering. Bigger suckers give early yield. Prior to planting curing of slips and suckers for 8-10 days in shade is necessary as fresh suckers planted in moist soil begin to decay. Before planting some of the lower leaves are removed from the sucker to facilitate the formation and entry of roots into the soil. After removing scaly leaves, planting material should be treated with Monocrotophos (0.15%) or 0.05% quinalphos and Carbendazim (0.1%) solution to protect against mealy bugs and heart rot, respectively. Alternatively, a solution of Hilban (2.5ml/l) and Indofil (2.5g/l) can be used for dipping of suckers.
Fig: ex vitro gradual performance of tissue culture grown seedlings of pineapple


Organic enigmas to rose cultivation


Points to consider:
The first step to successful rose growing begins with choosing an area in the garden where they are sure to thrive.Sunlight is very important for roses – select a spot that gets six to eight hours of sun a day and has good drainage.Adequate space is imperative. Roses need excellent air circulation to prevent disease and to ensure you have enough room to tend to them. Each rose bush should have a 3 foot diameter space to flourish.
Soil : Soil quality can make or break your rose garden. pH of your soil plays an important role in the quality of the roses you. The optimum pH for rose cultivation should be around 6.5.
Soil adjustments: - To acidify the soil, try adding an organic mulch – which is also quite beneficial for microbial life and improving the general quality of the soil.  Composition made with pine bark, pine needles or sawdust can be used. Recycling kitchen waste such as citrus peels or vegetable peels work wonders at lowering the pH. White vinegar adds acid to the soil. To make an acid boosting solution for roses, 1 tablespoon of white vinegar should be combined with 1 gallon of water. The vinegar solution should replace one regular watering every three months. To raise the pH, making the soil more alkaline, it’s often recommended to use lime to slowly raise levels over a few months. However, natural options like ground crab or oyster shells, crushed eggshells or hardwood ashes are also very effective.
Variety selection : Choose a hardy variety of rose that’s right for the garden condition. As rose bushes can vary greatly in size, it is needed to consider the space available in garden. If roses are to be grown on a trellis, variety selection should be from the climbers, ramblers and old garden rose categories.Variety selection should also be done considering their ability to resist various pests and pathogens.
Irrigation tips : After planting, make sure to water frequently, especially in the first few weeks.Soil type will dictate water volume also – roses growing in sandy soil need more water than those in clay.Wet the entire root zone. If the top two inches of soil are dry, give them extra water. Only wet the soil, not the leaves as this can lead to disease. At the time of picking make sure to wet them infrequently and always in the morning so they can dry out before night falls.

Nutrient application: Gardeners adore roses of all colors for their beauty, fragrance and romantic appeal. Roses thrive even when neglected, but an application of fertilizer helps plants grow healthy roots and colorful blossoms.Homemade fertilizers contain natural or organic ingredients, and they break down more slowly than chemical fertilizers.

Kelp and Molasses Fertilizer: Fertilizer containing molasses, kelp, powdered fish and apple cider vinegar supplies roses with a balanced dose of nutrients that promotes foliage and flower growth. To make the fertilizer, 3 cups of water should be combined with 2 tablespoons of molasses, 1 tablespoon of Epsom salts, 2 tablespoons of apple cider vinegar, 1 tablespoon of kelp extract and 2 tablespoons of powdered fish. In the summer, 1/2 gallon of the fertilizer should be applied in the evening after roses have been watered. A repeat application in six to eight weeks, near the end of summer, helps encourage blooming until fall or winter.
.

Coffee Grounds: Coffee grounds provide roses with small amounts of potassium, nitrogen and magnesium.A handful of dry coffee grounds should be sprinkled on the surface of the soil around the roses.
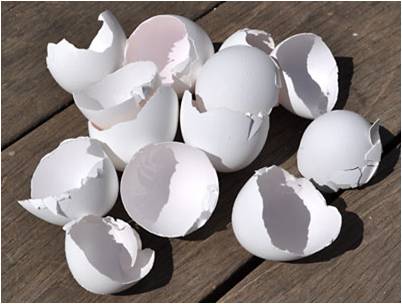
Egg Shells: Egg shells contain large amounts of calcium carbonate, an ingredient found in agricultural lime. They make an excellent addition to compost, and when crumbled into tiny pieces, they can be applied directly to the soil around roses.

Epsom Salts : Epsom salts consist of sulfate and magnesium, nutrients that roses need to carry out many essential functions. For example, magnesium assists in photosynthesis and sulfate aids nutrient uptake. A mixture of 1 gallon of water and 1 tablespoon of Epsom salts should replace a regular watering once per month.

Fish Tank Water: Fish tanks need regular cleaning, but instead of pouring the water down the drain, gardeners can use it to fertilize roses. Fish tank water contains a high amount of nitrogen. The fish tank water can replace a regular watering. Excessively dirty or moldy water should not be used.

Banana Peels : Banana peels contain a high amount of potassium.  To use them as rose fertilizer, gardeners can bury the banana peels 4 to 6 inches deep at the base of the plants.

Fig: Coco peat

Homemade Organic Rose Fertilizer
Recipe :  2 tablespoons Mermaid's fish fertilizer (powdered fish) ,1 teaspoon Maxicrop kelp extract (powdered seaweed) ,1 tablespoon Epsom salts,2 tablespoons apple cider vinegar  ,2 tablespoons molasses and 3 cups water.
Application
•       Combine in a quartsize, liquid measuring cup. Stir with a wire whisk to remove the lumps.
•       Pour into a 2gallon watering can, and fill the can with water. This mixture makes a good foliar feed.
•       It's best to apply it in the evening, since harsh afternoon sunlight might burn the leaves.
•       *Don't apply fertilizer to drought stressed roses. They should be well watered first.
•       Other rose food
•       Ingredients: one cup each of gypsum, alfalfa meal, greensand and half a cup of bone meal.
•       Mix the ingredients inside the bucket and your rose food is ready.
•       Make sure to wear a dust mask, while mixing them.
•       Rose food made as per this recipe will be sufficient for a large bush or three to four small ones.

Pruning tips  :   Roses are best pruned when out of bloom, which naturally improves plant health and keeps them nice and tidy looking. Remove any leaves that remain on the plant and cut off dead or diseased branches. A good way to tell if a branch is dead (aside from it being brown or black) is that the inside of the stem will be brown instead of green. Make sure to rake up any leaves and stems from under the plant to cut down on disease and pests.

Mulching : Mulching prevents moisture from escaping from the ground and keeps the roses hydrated. It also keeps the shrubs’ feet cool during the summer, stops weeds from growing, improves soil fertility over time and gives the rose bed a manicured appearance. Organic mulches  in rose cultivation include grass cuttings, pine needles, wood chips, shredded leaves, peanut hulls, or cocoa bean hulls.
Disease and pest management
Botrytis : This fungal disease attacks rose leaves and canes, and may also prevent blooms from opening. Organic control : Apply provide plenty of air circulation .Also, be sure to keep the area under the plant clean to prevent reoccurrence.
Powdery Mildew : To reduce the chances of powdery mildew, be sure to keep the ground under rose bushes clean and try to increase air circulation. Organic control- Water only in the morning hours to avoid moisture build up. To treat powdery mildew, try this home made remedy: 1 teaspoon baking soda, 1/2 teaspoon oil and one quart of warm water. Mix and then apply by spray bottle.
 Black Spot : One of the most common plant diseases affecting roses, black spot can be difficult to control and may also increase the likelihood of winter injury. Organic Control - Remove and destroy any fallen debris or foliage and mulch often. Make sure your roses have proper air circulation and water from below, if at all possible.
Insects:
Mites: use neem oil or insecticidal soap.
Rose Bud Borers: spray insecticidal soap mixed with pyrethrin.
Rose Chafers: use a botanical insecticide.
Leafcutter Bees: prune out the injured tips several inches below the damaged area and seal the cut with grating compound or some sort of sealing putty.

Conclusion
Roses have always been a favorite among flower lovers. These plants are commonly grown in home gardens. Most of the rose varieties are easy to grow and if properly taken care of, they reward us with fragrant and colorful flowers used for decoration and many other purposes.Growing roses organically is more effective, less complicated, and safer for both us and the environment as it sustain and enhance the health of soil, plant, animal, human and planet as one individual and also protect the livelihood and well-being of future generations.


Strawberry Plug Plant Production


Introduction
Annual hill strawberry plantings are generally established by using either fresh dug or dormant coldstored “frigo” plants. Both fresh dug and dormant plants are relatively inexpensive. However, fresh dug plants are generally not commercially available until October when they are dug by nurseries for large California and Florida plantings. October is too late for planting in Northern Utah, where optimal planting dates are in late August to early September. Dormant plants are generally dug in the late fall or winter and cold stored for planting in the spring and early summer. However, by September most of the plants have been in cold storage for such a long period of time that plant viability is decreased (Hokanson et al., 2004). Plug or tray plants (Figure 1) offer an alternative approach for obtaining strawberry starts for use in annual hill and high tunnel production systems. While plug plants are more expensive than fresh-dug or dormant plants, they typically offer the appropriate level of initial vigor for fall planting. However, commercial availability of plug plants is extremely limited. Currently there are no commercial nurseries in the Intermountain West producing plugs and shipping costs for fresh plants make ordering from distant nurseries prohibitively expensive. Plug plants are relatively easy to grow and can be produced in a small greenhouse or cold frame. Dormant cold-stored mother plants are planted in the late spring/early summer to produce runner tips for propagation. If mother plants are ordered in January or February, there are generally a large number of varieties to choose from. Most suppliers will store plants in their specialized storage facilities at no additional costs until growers are ready to plant.

Producing the runner tips
Site selection and establishment - The first step in producing strawberry plug plants is to produce the runner tips. Runners are produced from mother plants, which can be grown either in a greenhouse or field. Plants can be grown in the soil or in peat-filled grow bags placed on the soil or on benches. Runner production is favored by high temperatures and long days, hence outdoor production would be limited to the summertime. With either system (outdoor or greenhouse) care should be taken to prevent runners from coming in direct contact with soil. In the greenhouse, suspended growing systems (Figures 2 & 3) are used to prevent runners from coming in contact with soil. In the field, a combination of straw mulch between rows and plastic mulch within the row will prevent runner tips from contacting the soil. In the greenhouse, the first runner tips can be expected about 8 to 10 weeks after establishing the mother plant (Durner et al., 2002). The number of runners produced per plant will increase over time and as the mother plants get bigger. However, the number of runners per mother plant and the time from establishment to runner production will vary somewhat by cultivar. In some circumstances it may be advantageous to establish plants 3 to 4 months before runners are to be harvested in order to obtain more runners per mother plant.


Greenhouses provide the ideal setting for runner production. Greenhouses can be managed to provide ideal day time temperatures (above 75°F) and long photoperiods (about 16 hours). With supplemental heat and light, runner production can occur year round. Elevated planting beds in the greenhouse facilitate runner harvesting. PVC rain gutters filled with a soil-less potting mix provide a simple and efficient elevated production system (Figure 2). Plants are spaced 9 to 12 inches apart in the gutters. The resulting small root volume requires frequent irrigation and fertilizer application. Drainage holes should be drilled in the bottom of the gutters to prevent water saturation of the soil. Irrigation events will vary with different planting configurations; however, the principles are the same. Plants should be watered often enough that the soil doesn’t dry out and cause the plant to wilt. Each irrigation cycle will normally last until water starts dripping out the drain holes, which is an indication that the soil profile is full. During peak runner production plants usually need to be irrigated once every 3 to 4 hours, with each irrigation event lasting 3 to 4 minutes. This irrigation frequency can be easily achieved with a simple time clock and automatic valve.
Tip harvest and propagation


Runner tips should be harvested when root initials (little white or brown pegs, Figure 4) are present on the runner tip. Root initials should not be longer than ½ inch. Additionally, at least two trifoliate leaves (first leaves that appear from the runner tip) are needed and should be between 2½ and 4 inches in length (Durner et al., 2002) (Figure 5). Runner tips where the oldest trifoliate leaf is larger or smaller will have limited success in establishment. Depending on individual needs and desire for uniformity of runner tips, tips are generally harvested every 10 to14 days. Sorting tips by size will prevent larger plug plants from crowding out the smaller ones in the tray (Durner et al., 2002; Takeda and Newell, 2006). Fifty cell plug trays with approximately 7 cubic inches per cell work best for strawberry plug production. Runners should be removed such that the trifoliate leaves are not damaged and approximately ½ inch of the runner is left to be used for an anchor when planting tips into plug trays (Figure 5) (Durner et al., 2002; Takeda and Newell, 2006). Runner tips should be planted immediately after harvest. In commercial operations, runners are usually planted or cooled to 32°F within 45 minutes. If runner tip storage is necessary, tips should be stored at 32 to 34°F at 95 percent humidity for no more than 1 week (Durner et al., 2002). Tips should be planted such that the root pegs and anchor are just below the soil surface, with the leaves and as much of the developing crown as possible remaining above the soil surface (Figure 6). The soil should then be pressed lightly around the runner tips to hold the plant in place. After the runner tips have been planted, they need to be protected from the wind, and leaves need to remain moist until the plant can establish a new root system. Maintaining moisture on the leaf is usually accomplished with a misting system. Misting the plants intermittently for 7 to 12 days is generally sufficient. For the first 3 to 4 days, misting should be more frequent and for shorter periods of time (every 5 minutes for about 10 seconds). After 3 to 4 days, the misting time may be increased to 30 seconds every 12 minutes. As time goes by, the misting interval should remain at about 12 minutes, and misting time should gradually be decreased as the plant roots become more established. Protecting plants from wind, heat, and direct sunlight will provide the best results. Shaded greenhouses or shade houses with protection from wind provide the best environment. After the misting regime is finished, plants should be allowed to harden off in the greenhouse for 1 to 2 weeks prior to their establishment in the field or high tunnel (Durner et al., 2002). Generally, a runner tip will produce a well-rooted plug in about 4 weeks.

An Effective Technology for Cauliflower Seed Production


Cauliflower is a very important nutritious vegetable crop grown in Bangladesh in the winter season. Since it is a very delicious vegetable and there is a good demand of cauliflower due to different categories of recipes can be prepared from this vegetable; it has become a very popular vegetable in Bangladesh in recent years. Cauliflower is relatively a short duration decorative type crop and different types of varieties including extra early, early, mid season and late season varieties of cauliflower are now available in the market. And this is why the vegetable growers showing more interest to grow cauliflower in major part of the year (near about 8 months) in Bangladesh. Extra early season and early season cauliflower varieties are boon to the growers as their curds usually fetches higher price than the seasonal type. However, cauliflower seed production is very rare in Bangladesh though cauliflower seed production is a profitable seed business and huge quantity of seeds is usually imported every year to meet the growing market demand of cauliflower seeds. Naturally the seed price of cauliflower seeds is very high (TK. $ 625 to $ 820 per Kg) and as sufficient information regarding their sowing time, cultivation method of the foreign seeds remains unknown, many grower usually incur losses annually by growing this otherwise profitable crop. But, if it would be possible to produce cauliflower seeds locally in Bangladesh several critical problems regarding cauliflower production could be minimized. Not only that a huge amount of foreign currency could be saved annually which are being drained out every year for purchasing cauliflower
seeds from foreign companies. It can be mentioned here that cool season is very much essential for the production of cauliflower seed and as we have cool and dry season it is possible to produce seeds of cauliflower in Bangladesh locally using suitable variety/varieties and techniques as well. Therefore, an attempt was made to produce cauliflower seeds (early season type) at BRAC Agricultural Research & Development Centre (BARDC) using locally available varieties following curd scooping method in the Rabi season (winter season). 
The techniques for the production of cauliflower seeds by this method has been described below:
Step-1: Selection of an early type cauliflower variety. In Bangladesh, for cauliflower seed production the most important criteria are selection of a suitable variety and setting a suitable growing period of the cauliflower targeted for seed production. It has been observed that early bolting type variety ensure good seed production in cauliflower. Naturally in Bangladeshi agro climatic condition a good early season variety is very much suitable for commercial seed
production.
Step-2: Sterilization. All the apparatus to be used for curd scooping i.e. knife; forceps etc. should be clean and have to be sterilized by wiping up these apparatus with rectified spirit. Hands should also be sterilized by the spirit.
Step-3: Selection of curd and removing the central portion of the curd. Morning is the best time for removing the core of the curd. A relatively matured large size half loose curd having the diameter of 18-22 cm (700 gm to 1 Kg; which has already lost the compactness of the curd) will be selected for this purpose (Fig.1). Now the central portion of the curd will have to be removed by cutting the core portion of the curd (2.50-2.75 cm. diameter from the centre) using a sharp knife.

Step-4: Cleaning. After removing the core portion of the curd the wounds will be cleaned gently by a piece of cotton sterilized with rectified spirit (Figs. 2 &3).

Step-5: Protection from fungal infection. In the same day at afternoon ‘Indofil’ or any other ‘Mancojeb’ containing fungicide (1 gm per litre) will have to be sprayed gently over the curd to prevent any damage of the curd due to fungal infection.
Step-6: Nursing. This is a very important step for cauliflower seed production. After removing the core portion of the cauliflower curd proper nursing will have to be provided for each plant through side dressing of chemical fertilizer and organic manure alternatively and supplying light irrigation. It is better to avoid flood irrigation during this stage rather gentle can irrigation should be ensured. At this stage oldest leaves will have to be removed to keep the plant more healthy.

Step-7: Supplementary pollination. At the time of flowering normal cross pollination can be supplemented manually by shaking plants with the hand besides allowing more insects as main pollinator. At this stage the abortive parts of the curd (i.e. the part of the curd which did not produce flower stalks) will be removed carefully by cutting them with sharp knife or blade.
Step-8: Disbudding & Staking. After the production of the desired number of siliqua the terminal part of each of the fruit stalks (peduncles) will be snapped to ensure better growth of the fruits and the seeds within it. At this stage staking will also be provided to the plants with suitable size sticks (Fig.7). Spraying of pesticides following a suitable schedule will keep the plant more healthy which is very much essential for cauliflower seed production as well.

Step-9: Harvesting. After the completion of proper ripening of fruits i.e. when the siliquas will fully ripen and become dry on fruit stalks; these dry fruits will be collected in net bags. After collecting fruits, all the fruits will be dried in the sun for 1-2 days. Finally the seeds will be collected by crumbling the dry fruits. Once the seeds are separated from fruits the properly mature seeds will be dried again for 1-2 days in the sun to keep the moisture level 7- 8% before storage.
Curd scooping is a very good technique for cauliflower seed production. By following this technique 25-30 gm. of good quality seeds from each plant can be produced. High quality healthy seedlings were produced from these seeds in the following year and standard size curds were also harvested from the plants raised from these good quality seeds.

Ready to Rocker : Cultivation practices of Tuberose

INTRODUCTION

Tuberose (Polianthes tuberosa L.) is one of the most important tropical ornamental bulbous flowering plants cultivated for production of long lasting flower spikes. It is popularly known as Rajanigandha or Nishigandha. It belongs to the family Amaryllidaceae and is native of Mexico. Tuberose is an important commercial cut as well as loose flower crop due to pleasant fragrance, longer vase-life of spikes, higher returns and wide adaptability to varied climate and soil. They are valued much by the aesthetic world for their beauty and fragrance. The flowers are attractive
Field view of Tuberose

and elegant in appearance with sweet fragrance. It has long been cherished for the aromatic oils extracted from its fragrant white flowers. Tuberose blooms throughout the year and its clustered spikes are rich in fragrance; florets are star shaped, waxy and loosely arranged on spike that can reach up to 30 to 45 cm in length.The flower is very popular for its strong fragrance and its essential oil is important component of highgrade perfumes. ‘Single’ varieties are more fragrant than ‘Double’ type and contain 0.08 to 0.14 percent concrete which is used in high grade perfumes (Singh and Uma, 1995). There is high demand for tuberose concrete and absolute in international markets which fetch a very good price. Flowers of the Single type (single row of perianth) are commonly used for extraction of essential oil, loose flowers, making garland etc., while that of Double varieties (more than two rows of perianth) are used as cut flowers, garden display and interior decoration. Fragrance of flowers is very sweet, floral and honey-like and can help give emotional strength. It is known to improve an individual’s capacity for emotional depth and can stimulate the right side of the brain and bring serenity to the mind and heart. The flower spike of tuberose remains fresh for long time and finds a distinct place in the flower markets. Due to its immense export potential, cultivation of tuberose is gaining momentum day by day in our country.
Soil
Tuberose can be grown on wide variety of soils ranging from light, sandy loam to a clay loam. It can also be successfully grown as a commercial crop even in those soils which are affected by salinity and alkalinity conditions if better agronomical practices are adopted. The soil should be at least 45 cm deep, well drained, friable, rich in organic matter and nutrients with plenty of moisture in it. Tuberose should be grown in well drained place. Crop is sensitive to water stagnation and it cannot tolerate water logging even for a short period. So it is very essential to ensure proper drainage or else planting should be done on bund. Fertile, loamy and sandy soils
having a pH in the range of 6.5 to 7.5 with good aeration and drainage are ideal for tuberose cultivation. A place protected from strong winds is preferable.
Cultivars
Single flower type (Rajat Rekha, Shringar,Prajwal, Mexican, Calcuttia and local types)
Double flower type (Swarna Rekha,Suvasini, Vaibhav, Arka Nirantara, Mexican,Calcuttia and local).
Selection of site
Tuberose is a sun-loving plant. For attaining good vegetative growth and maximum yield of flowers, a site should be chosen, where the plants will get plenty of sun throughout their growing period. The soil should have sufficient moisture holding capacity. A place protected from strong wind, hot and cold waves is preferable, so that there is no damage of flower stalk. In shady situation, the plants grow tall and lanky and the flowering is adversely affected. They are highly susceptible to water stagnation and poor drainage conditions and hence require well drained and aerated soil.
Field or land Preparation
The land should be ploughed deep to a good tilth, 2-3 times , to a depth of 30 - 45 cm. The first ploughing should be done in January. The field is left exposed to sun for at least 15 days
that destroys the weeds and insectpests. The second ploughing can be done about a month before planting. At the time of the second ploughing, well rotten farmyard manure at the rate of 50 tonnes per hectare should be incorporated into the soil. Then, the soil is brought to a fine tilth by breaking the clods and removing the weeds. After field preparation, plots of convenient sizes should be prepared with irrigation channels, ridges and furrows at the recommended spacing.

Propagation
Tuberoses are propagated by bulbs, bulblets and seeds. Multiplication by bulb-segments and in vitro micro propagation from scale stem-sections is also practiced.
Propagation by bulbs
Most common method practiced for the commercial multiplication of tuberoses is through propagation by bulbs. The bulbs remain dormant during the winter months in places where the temperature is low. The dormancy of the bulbs can be successfully broken by dipping thebulbs in 4% Thiourea solution for one hour if early planting is desired. Ethylene chlorohydrins can also be used for breaking the dormancy of bulbs. The bulbs are separated from the clumps by rubbing off the loose scales and the long roots should also be removed. Selection of suitablebulbs is very important for successful cultivation. In general, spindle-shaped bulbs free from diseases having diameter between 1.5 and 3.0 cm are suitable for planting. About 1.25 - 1.5 lakh bulbs (8 to 9 tons of bulbs) are required for planting one hectare.
Propagation by bulb segments
Propagation through mature bulbs is expensive, therefore, multiplication of growing stock can be done by division of bulbs. Large sized bulbs having 2.1 cm or more diameter are suitable for planting purpose. If the bulbs are very large, they are cut into 2 to 3 vertical sections, each containing a bud and part of the basal plate. Each of these sections is treated
with copper fungicide and planted vertically in a rooting medium with its tip just showing above the surface. A moderately warm temperature should be maintained. New bulblets along with roots develop from the basal plate. At this stage, bulblets are transferred to the ground.
Tuberose bulbs in clumps

SPACING:
A bulbs are planted at an optimum spacing of 30 x 20 cm or 20 x 20 cm. About 40,000- 50,000 bulbs are required for one acre planting of tuberose. ie) about 1,00,000 to 2, 00,000 bulbs are required for planting one hectare of land.

Depth of planting
The depth of planting varies from 3.0 - 7.0 cm depending upon the diameter of the bulb and the soil type. It should be 2.5 times more than the diameter of bulbs. While planting, the bulbs are planted at the recommended plant-spacing, 4-6 cm deep on the sides of the ridges. Planting is deeper in sandy soil as compared to clay soil. In sandy loam soil planting of bulbs is done at the depth of 6.0 cm. In general, planting is done in such a way that the growing portion of the bulb is kept at the ground level.
Seed / bulb treatment
Dipping the bulbs in 4% solution of thiourea can break the resting period. Pre-plant storage of bulbs at 10°C for a period of 30 days will improve the plant growth, increase spike and flower yield. Pre-planting treatment of bulbs with GA3, etherel or thiourea promotes early appearance of flower spike and produces longer spikes with maximum number of florets. The bulbs are first thoroughly cleaned and treated with Bavistin (0.2%) for 30 minutes. Dipping the bulbs for about 20-30 minutes in a solution of Emisan (0.2%), Thiram (0.3%), Captan (0.2%) or Benlate (0.2%) is also recommended. Dry in shade before planting or storing. Before planting treat bulbs in systemic fungicide and before storing in contact fungicide.
Nutrient management
Tuberose responds well to the application of organic and inorganic manures. Apart from FYM (20 tonnes/ha), a fertilizer dose of 100 kg N, 50 kg P2O5 and 70 kg K2O per hectare is recommended for tuberose production. For achieving increased essential oil content in flowers and for the maximum recovery of concrete, a fertilizer dose of 80 kg N, 60 kg P2O5 and 40 kg K2O per hectare has been recommended. Of the full recommended dose of fertilizers, half the N, the full dose of P and K has to be applied at the time of planting and the remaining half of N is given as a top-dressing after 45 days of planting.
Micronutrients
Apart from N, P and K, calcium, magnesium, sulphur, iron, zinc, manganese, aluminium, boron and copper have also been found to influence the growth and flowering in tuberoses. Foliar spray of ZnSO4 0.5% + FeSO4 0.2% + Boric acid 0.1% improves growth and flowering.
Use of Growth regulators
Foliar application of GA3 at 50 to 100 ppm thrice at 40, 55 and 60 days after planting is found to be beneficial. The application of CCC at 5000 ppm and GA3 at 1000 ppm induces early
flowering, increased flower stalk production and improves the quality of flowers.
Water and Irrigation Management
It is very essential to irrigate before planting to provide optimum moisture for sprouting and further irrigation should be avoided until the bulbs are sprouted. Subsequent irrigation to the crop is given, depending upon the prevailing weather conditions.In the summer months, irrigation is recommended twice a week and during winter at 10 days interval.


Intercultural Operation:
Manual weeding is effective and should be done at monthly interval. Control of weeds by using chemicals is also found effective. A pre-emergent treatment of Gramaxone (@ 3 litres /
ha) followed by three post- emergent sprayings at intervals of 110 days in between the rows keeps the crop weed free. Application of Atrazine @ 3 kg/ha in 1000 litres of water as a pre-emergent weedicide also keeps the plots weed-free. Atrazine @1.0-1.5 kg /ha in 1000 litres of water sprayed immediately after planting of bulbs, significantly reduces th weed population. Mulching the plots with strips of black polythene, dried grass and chopped straw is effective in controlling weeds. Hoeing between plants at regular intervals is helpful in loosening the soil and uprooting weeds. Earthing - up enables the spikes to grow erect, despite strong winds and rains. Earthing up to 10-15 cm height is done when plants are 15- 20 cm high. The flower-spikes should be supported by stakes after about 2 1/2 months of planting. Staking with bamboo or wooden sticks is done in beds and string or rope may be tied in three rows along the plant-rows to avoid lodging of plants.
 Harvesting
Flowers are ready for harvesting


Tuberose flowers are ready for harvesting after 100-120 days of planting. Harvesting is done in cool hours either in the morning or evening.
Local market: Cut flowers are harvested when lower one pair of flowers is fully open
Distant market: Lower pair of flower buds has just burst
Loose flowers: Fully/ half open flowers
Grading: Tuberose cut flowers are graded according to spike length, rachis length and number of flowers per spike.Loose flowers is graded according to flower size.
Packaging: Cut flowers are marketed in bunches of 25, 50 or 100 and these bunches/bundles are packed in bamboo baskets, card board cartons/containers and are transported vertically.
Loose flowers are packed in bamboo baskets or gunny bags or polythene bags lined with newspaper.
Bulb Harvesting
Harvest bulbs after 40-50 days of flowering or foliage start turning yellow. Treat bulbs before storing.The bulbs are graded into two sizes as small less than 1.5 cm in diameter and large more than 1.5 cm in diameter.Tuberose bulbs are harvested/lifted after 2-3 years.